
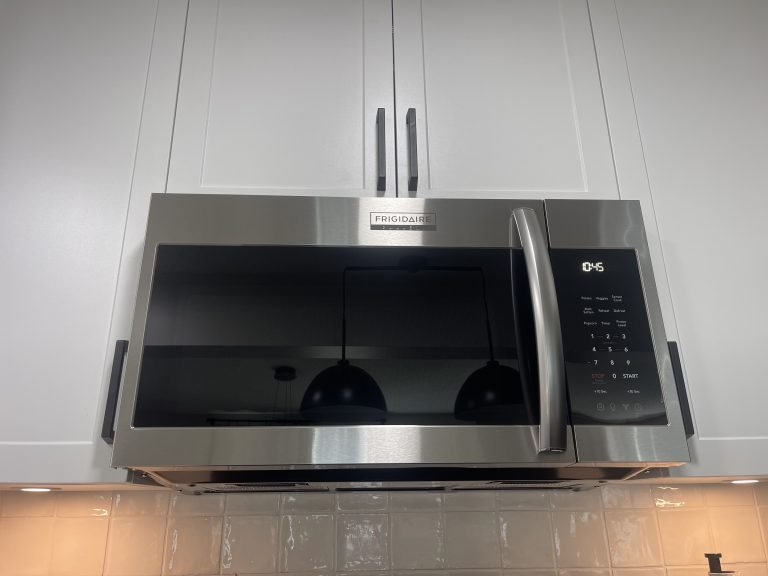
Microwaves make everyday cooking convenient, but frequent use can quickly leave them covered in food splatters, grease, and stubborn residue. If you leave spills too long, they can dry onto the interior and become much harder to remove. Regular cleaning keeps the appliance hygienic, prevents odors from building up, and makes it easier to spot damage or unusual problems.
The good news is that you do not need expensive cleaning products to maintain a microwave. With a microwave-safe bowl, water, a soft cloth, and mild dish soap, you can handle most routine cleaning. Whirlpool also recommends using steam to loosen stubborn buildup before wiping the interior.
How Often Should You Clean a Microwave?
How often you need to clean your microwave depends on how frequently you use it and what you cook inside.
For a household that uses the microwave daily, a quick wipe after messy spills and a more thorough cleaning about once a week is a practical routine. Whirlpool recommends weekly cleaning for regular users and advises cleaning larger spills promptly rather than allowing them to harden.
Waiting until food residue bakes onto the interior makes the job much harder.
What You Need to Clean a Microwave
Gather your supplies before starting:
- Microwave-safe bowl or measuring cup
- Water
- Mild dish soap
- Soft microfiber cloth or sponge
- Clean, dry towel
- Soft toothbrush for small areas, if necessary
You can also use lemon or baking soda for certain cleaning methods, but always check your microwave manufacturer’s instructions first. Cleaning recommendations can differ between brands. For example, Whirlpool lists vinegar and lemon juice as optional cleaning ingredients, while Bosch specifically advises against vinegar on its microwave surfaces.
Step 1: Turn Off and Empty the Microwave
Before cleaning, make sure the microwave is switched off.
Remove everything from inside, including:
- Glass turntable
- Turntable support ring
- Microwave-safe containers
- Any removable accessories
This gives you unobstructed access to the entire interior. Never spray cleaning solution directly into the microwave. Excess liquid can enter openings, controls, or other areas where moisture should not accumulate.
Step 2: Wash the Turntable Separately
The glass turntable usually collects food splashes and grease, so remove it and wash it separately with warm water and mild dish soap. Clean the support ring as well, paying attention to food particles that may have accumulated underneath it.
Rinse both components and dry them thoroughly before putting them back. If the turntable is hot, allow it to cool before washing it. Sudden temperature changes can potentially damage glass.
Step 3: Steam Away Stubborn Food
For dried-on food, steam can make the biggest difference.
Place approximately one cup of water in a microwave-safe container and heat it for several minutes. Whirlpool recommends heating water for about three to four minutes for heavy buildup, allowing the steam to loosen residue.
Once the cycle finishes, don’t reach into the microwave immediately. The container and steam may be very hot. Let the steam work for a few more minutes with the door closed. The goal is to soften the residue so you can wipe it away without aggressive scrubbing.
Step 4: Wipe the Interior Walls
Use a soft, damp cloth to wipe the ceiling, back wall, side walls, and floor of the microwave.
Work from the top down so loosened residue does not fall onto areas you have already cleaned.
Pay particular attention to:
- Grease around the ceiling
- Food splatters on the side walls
- Dried sauce around the bottom
- Corners and seams
- Areas around the door opening
Avoid abrasive scouring pads or harsh cleaners that could damage the microwave’s interior surface.
Step 5: Clean Stubborn Spots Carefully
If residue remains after steaming, dampen your cloth with mild dish soap and gently work over the affected area. Do not scrape the interior aggressively with a knife, metal utensil, or abrasive tool. Damaging the interior coating can create a bigger problem than the original food stain.
For persistent buildup, repeat the steaming process rather than applying increasingly aggressive chemicals.
Step 6: Clean the Microwave Door
The door needs attention on both sides. Wipe the inside of the glass and the surrounding frame with a soft, damp cloth. Remove grease and food particles around the edges where the door closes.
Then clean the outside of the door using a suitable soft cloth and mild cleaner. Be especially careful around the door seal. Do not scrub, bend, or damage the gasket or sealing surfaces. If the door glass is cracked, the door does not close correctly, or the seal appears damaged, stop using the appliance until the problem has been assessed.
Step 7: Clean the Exterior and Controls
Wipe the outside of the microwave with a slightly damp soft cloth.
For stainless steel surfaces, follow the manufacturer’s cleaning instructions. Whirlpool recommends wiping stainless steel in the direction of the grain, while Bosch advises mild soapy water and a soft cloth and warns against abrasive or chlorine-based cleaners.
Take care around buttons, touch controls, vents, and display panels. Do not allow liquid to run into openings. If the control panel needs cleaning, apply cleaner to the cloth rather than directly onto the controls.
Step 8: Dry Everything Thoroughly
Once the interior and exterior are clean, use a dry microfiber cloth to remove remaining moisture. Leave the microwave door open briefly, if needed, so the interior can dry completely.
Wash and dry the turntable and support ring before reinstalling them. Then make sure the turntable rotates freely.
Step 9: Check the Microwave Before Using It Again
Cleaning is also a good opportunity to inspect the appliance.
Look for:
- Cracks or damage inside the cavity
- Peeling or damaged interior surfaces
- A damaged door seal
- Cracked door glass
- Unusual rust
- Burn marks
- Loose components
- Unusual smells
- Unusual sounds
A dirty microwave and a malfunctioning microwave are two different problems. Cleaning can remove food residue and odors, but it will not fix a defective electrical or mechanical component. For that, you need professional oven repair services.
What You Should Never Use to Clean a Microwave
Avoid aggressive cleaning methods that could damage the appliance.
Do not use:
- Steel wool
- Abrasive scouring pads
- Harsh chemical cleaners
- Chlorine-based cleaners
- Metal scrapers
- Excessive amounts of water
- Cleaning products that your manufacturer specifically prohibits
Bosch, for example, advises against chlorine-based cleaners and abrasive materials on its microwave surfaces. Also avoid using any cleaning solution inside the microwave without checking whether it is appropriate for your specific model.
Can You Clean a Microwave That Smells Bad?
Yes, routine cleaning can often remove odors caused by spilled food and grease. Start by cleaning the entire interior, including the ceiling and areas around the turntable. Steam can help loosen residue that is contributing to the smell. If the odor remains after thorough cleaning, pay attention to when it occurs.
A persistent burning, electrical, or unusual chemical smell is different from the smell of old food. If you notice an unusual odor accompanied by sparks, smoke, abnormal sounds, or heating problems, stop using the microwave and have it inspected.
How to Keep Your Microwave Cleaner for Longer
A few simple habits can significantly reduce cleaning time. Cover food before heating it, particularly liquids and sauces that are likely to splatter. Wipe spills as soon as the microwave has cooled enough to clean safely, and don’t let food residue build up.
Also avoid operating the microwave empty. If you notice arcing, sparking, unusual noises, or other abnormal behavior, stop using it rather than assuming the problem is simply caused by dirt.
When Cleaning Is Not Enough
Cleaning can solve a hygiene or residue problem, but it cannot repair a microwave that has developed an electrical or mechanical fault.
If the microwave stops heating, runs but does not warm food, sparks repeatedly, trips a circuit breaker, makes unusual noises, has a damaged door, or displays an error code, the issue requires diagnosis rather than another cleaning cycle.
Do not attempt to open the microwave cabinet yourself. Microwaves contain high-voltage components that can present a serious electrical hazard even when the appliance is unplugged.
We Repair Microwaves and Ovens Across Edmonton
If cleaning your microwave reveals a deeper appliance problem, our oven repair in Edmonton service can also help with ovens and ranges, including uneven heating, failed heating elements, weak gas igniters, error codes, or door problems. We service gas, electric, convection, and wall-mounted ovens and use OEM parts for repairs.
At Appliance Elite, we repair and maintain major household appliances, including microwaves, ovens, refrigerators, dishwashers, washers, and dryers. Our Edmonton technicians are licensed, bonded, insured, and background-checked, and we provide a written quote before repair work begins. Our completed repairs include a 90-day parts and labor warranty, and we credit the diagnostic fee toward an approved repair.